When & How to Use Shutter Speed In Photography
Beginning photographers often overlook the shutter speed. I know that I walked around for ages in aperture priority mode. When I switched to manual, I found myself setting the ISO and aperture first, and solving for what the shutter speed. If solving made you a little nervous there, keep reading. Below, I cover how to use shutter speed, when to prioritize it over aperture and ISO, and the best method for mastering shutter speed.
How to Use Shutter Speed
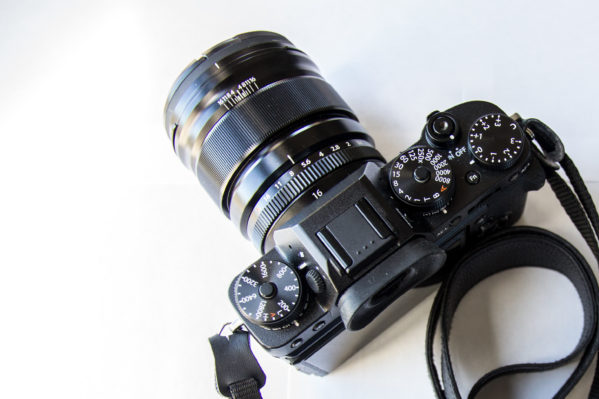
Shutter speed controls how quickly the the shutter closes on the camera lens, and is measured in fractions of a second. The dial on the X-T2 goes from 1 second to 1/8000th of a second. Alternatively, you can set the dial to “T” and use the horizontal scroll wheel to set the shutter speed.
On the Fuji X-T2, you set the shutter speed using the dial to the right of the viewfinder. If you want a speed that is in between the listed numbers, there is a horizontal scroll wheel on the back of the camera, also to the right of the viewfinder. The mechanical shutter speed on the X-T2 ranges from 30 seconds to 1/8000th of a second, and we will cover mechanical vs. electronic shutter in another post.
When the shutter is open, light hits the camera sensor, and the camera is able to capture the image. When you press the shutter button, it runs through a sequence of opening/closing. This exact moment is when the camera captures the image using it’s onboard sensor and computer.
For the Fuji X-T2 it looks like this:
Notice you can see the sensor pretty much all the time, because the camera is mirrorlesss, meaning the viewfinder does not require a mirror for you to see the image. Traditionally, a mirror is dropped down in front of the sensor when looking through the viewfinder. In the video below of a Canon 7D, you can see the mirror retracting, and then, the sensor drops into place to capture the image:
On the second video, I like how they took a few shots with the lens on the camera. It really illustrates the aperture as well, since you can see the aperture blades creating a smaller opening as the sensor drops into place behind the lens.
How to Use Shutter Speed – Stopping Motion vs. Capturing motion
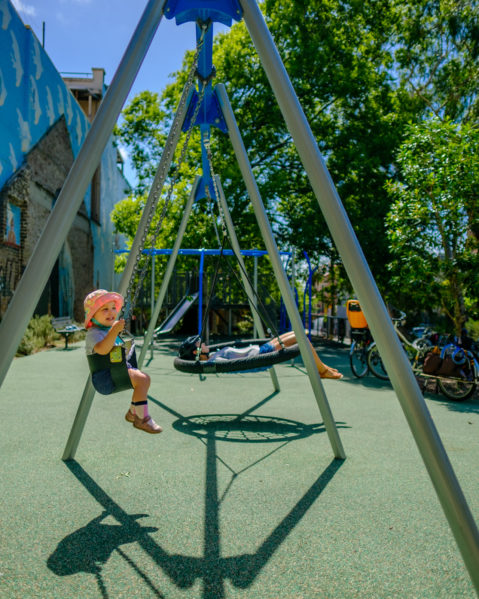
Shutter speed: 1/12,800
Shutter speed is the camera setting for motion. Do you want to stop time, freezing the entire frame, or do you want to illustrate some of the motion taking place? In the photo above, I wanted to capture CZ’s enjoying the swing, and to get that smile, required very fast swinging. I needed a fast enough shutter speed to freeze her movement so I cranked it all the way up. If the shutter speed was too low, CZ would be blurry as she swings through the frame. Although, sometimes the motion blur is a cool effect.
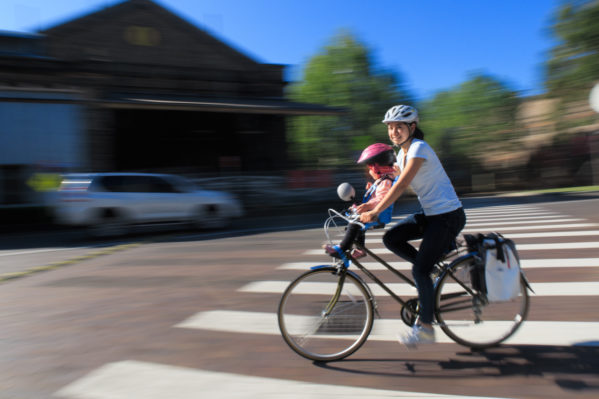
Shutter Speed: 1/20
In the shot above, I wanted to create a sense of speed and movement as EZ and CZ rode through the frame with the blurred motion in the background. This required a combination of moving the camera and using a slower shutter speed. More on that here.
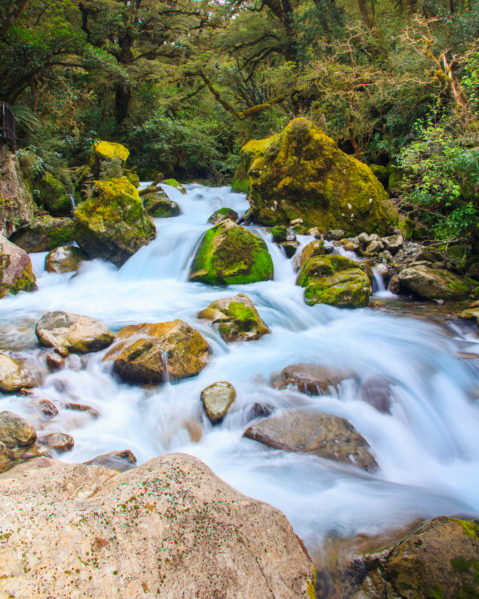
Shutter Speed: 1/2
Additionally, using a slower shutter speed is a cool way to capture the motion of water in landscape photos. As you see above, the rushing of the water down the stream is visible in the photo; however the individual droplets are not. Instead of stopping the water flow, I wanted to show the movement of the stream.
How to Use Shutter Speed – Distance
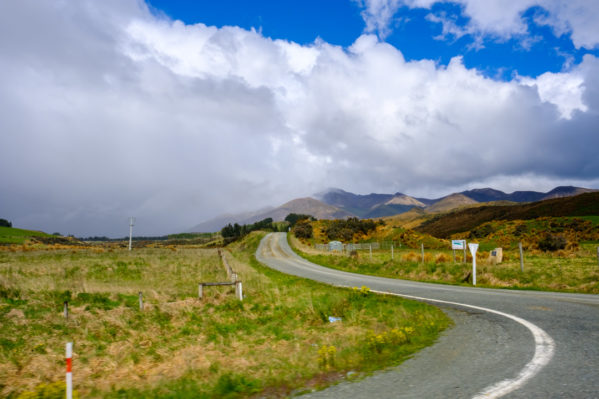
Shot from a moving car at 1/500th of a second.
There are additional factors that will impact shutter speed selection, such as distance. For example, closer objects appear to be moving faster. I was so close to the swing above that I needed a faster shutter speed to freeze the motion (see: physics). In the road trip shot above, notice how the objects in the distance are in fine focus, but the bottom of the frame is a touch blurry. Again, physics.
To further drive the point home, look at the lava photo below. It is a reasonably sharp photo taken from a flying helicopter at 1/400th of a second. This worked because the camera was much further from the subject than it was from the foreground in the road trip photo.
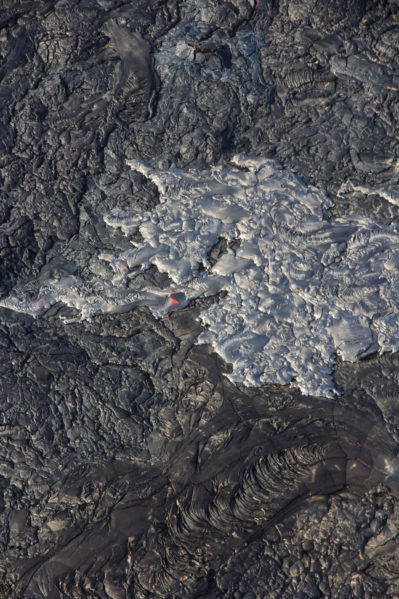
Shutter speed 1/400th of a second shot from a flying helicopter.
In short, remember that you may need a faster shutter speed than you realize for closer objects.
A General Shutter Speed Guide
- < 1/20 – Waterfalls with motion blur – Faster water flow means faster shutter speed, and for shutter speeds under 1/30 you need a tripod. See this post for more detail.
- < 1/250 – Stationary objects that are not blowing in the wind
- 1/250 – Children portraits and slower play
- 1/500 – Children running, bicycles, and lower speed cars
- 1/500+ – Photographs of or from fast moving vehicles
How to Use Shutter Speed – Shutter Priority
I think the best way to learn is through practice, and shutter priority mode is the best tool for the job. It allows you focus solely on the shutter speed, and leverages the camera’s auto capabilities. On the X-T2, put the ISO and aperture controls in auto, by selecting “A.” Then choose your shutter speed using the guide above, and adjust as needed for the situation. For Canons, select TV mode, and for Nikons it is S.
How to Use Shutter Speed – Wrap Up
- Remember that distance will impact your required shutter speed
- 1/250th of a second is the slowest shutter speed to freeze motion in most situations.
- Use shutter priority mode to accelerate your learning


1 Response
[…] When & How to Use Shutter Speed In Photography […]